Mold in kitchen cabinets is more than a surface-level problem — it’s a clear sign of excess moisture and can indicate hidden issues in your home. Left unchecked, it can damage cabinetry, ruin stored food, and even pose health risks. At Kraus Restoration, we’ve helped hundreds of homeowners eliminate mold at its source and prevent it from returning. Below, we’ll walk you through how to prevent mold in your cabinets — and what to do if it’s already there.
Why Does Mold Appear in Kitchen Cabinets?
Your kitchen creates the perfect storm for mold: frequent water use, temperature fluctuations, and limited airflow inside cabinets. Mold spores thrive in:
- Areas with leaky plumbing under sinks
- Condensation buildup due to poor insulation
- Steam from dishwashers or cooking
- Cabinets that are rarely opened, causing stale air to linger
- Leftover crumbs or organic debris inside drawers and shelves
Understanding which species are most likely to grow in kitchens starts with learning about the different types of mold. While black mold (Stachybotrys chartarum) is the most feared, other common species like Aspergillus, Penicillium, and Cladosporium are frequently found in kitchens — especially around moisture-prone areas like under-sink cabinets.
Want to understand the science behind mold growth? Read The Impact of Humidity on Mold Growth for a detailed breakdown.
How to Tell If There’s Mold in Your Cabinets
You don’t have to see mold to know it’s there. Look for these signs:
- A damp, earthy smell coming from cabinets
- Dark spots or fuzzy patches along corners, back panels, or shelf linings
- Warped or swollen cabinet wood, especially near the sink
- Respiratory symptoms or sneezing when spending time in the kitchen
How to Prevent Mold in Kitchen Cabinets
Proactive care is the best way to avoid costly mold damage. Here’s how:
1. Fix Leaks Immediately
Even a slow drip under the sink can create enough moisture to support mold. Regularly check faucet connections, garbage disposal seals, and drain pipes. Tighten fittings and replace worn washers or supply lines at the first sign of wear. Leaks hidden behind cabinets may require a deeper inspection — don’t ignore musty odors.
2. Improve Airflow and Ventilation
Moisture becomes trapped when cabinets remain closed for long periods. Crack open doors for 15–30 minutes after doing dishes, and ensure your range hood vents outside (not just back into the room). A ceiling fan or portable fan aimed at open cabinets once a week can also help. For more, check out The Role of Insulation in Mold Prevention.
3. Control Indoor Humidity
Keeping your kitchen’s humidity below 50% is essential. Use a digital hygrometer to monitor levels. If your home feels muggy or you see condensation on windows, consider installing a dehumidifier or improving ventilation. Read our article The Impact of Humidity on Mold Growth to learn how mold feeds on excess moisture.
4. Use Mold-Resistant Liners and Finishes
Line your cabinets with mold-resistant shelf paper or waterproof mats. If remodeling, ask your contractor about moisture-resistant plywood or paint with built-in anti-microbial properties. These small upgrades add an extra layer of protection.
5. Keep Cabinets Clean and Dry
Spills inside cabinets should be wiped up immediately. Don’t store wet sponges, rags, or food containers — even a damp lid can foster mold inside a warm, enclosed cabinet. Do a monthly wipe-down with white vinegar or mild detergent.
How to Get Rid of Mold in Kitchen Cabinets
Already spotted mold? Follow these detailed steps to handle it safely:
Step 1: Wear Protective Gear
Before you begin, wear rubber gloves, eye protection, and a mask (preferably N95). Mold spores can become airborne and irritate your lungs and skin.
Step 2: Empty the Cabinets
Remove all items — dishes, dry goods, organizers — and check them for contamination. Throw out anything porous or visibly moldy, like paper packaging or old rags.
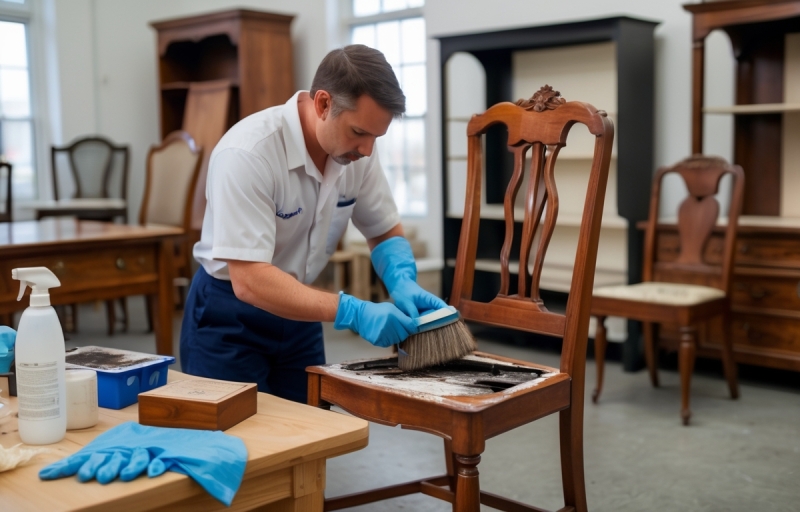
Step 3: Clean Surfaces Thoroughly
Mix equal parts white vinegar and water or use a non-toxic mold cleaner. Apply the solution to the affected area with a spray bottle and let it sit for 10–15 minutes. Scrub with a brush or sponge until all visible mold is gone. For tough stains, use baking soda as a gentle abrasive. Don’t forget to clean hardware, hinges, and edges.
Step 4: Dry the Cabinets Completely
Use paper towels or a microfiber cloth to wipe down surfaces. Then, position a portable fan or dehumidifier nearby for several hours. Do not restock items until the interior is completely dry — any leftover moisture can restart mold growth.
Step 5: Monitor the Area
Check the cleaned area daily for a week. If mold reappears, there may be a leak behind the cabinet or inside the wall. That’s when it’s time to call in the professionals. We explain more in Mold Remediation: DIY vs. Professional Help.
When to Call a Mold Remediation Expert
You should contact a certified mold remediation team like Kraus Restoration if:
- The mold covers more than 10 square feet
- It returns after multiple cleanings
- You detect a strong odor but can’t locate the source
- You or your family are experiencing unexplained allergies or breathing issues
We offer full-service Mold Cleanup and damage repair, including moisture detection and containment. Don’t wait until it spreads — call early and stay safe.
Final Thoughts
Mold in kitchen cabinets is common — but preventable. By staying ahead of moisture and addressing leaks or humidity early, you can protect your home, health, and cabinetry. And if the problem has already taken root, our experts at Kraus Restoration are just a call away.
✅ Ready to take action? Contact us today for mold inspection or remediation services across Central and Northern New Jersey.