Mold inside your kitchen cabinets is more than just a visual nuisance — it’s often a symptom of hidden moisture problems that can lead to structural damage, poor indoor air quality, and even health concerns. At Kraus Restoration, we specialize in identifying the sources of mold and eliminating them at the root.
In this guide, you’ll learn why mold appears in cabinets, how to prevent it, and what to do if you already have it — whether you handle it yourself or hire experts.
Why Mold Forms in Kitchen Cabinets
Kitchen cabinets often offer mold everything it needs to thrive: warmth, moisture, and organic materials like wood or dust. Common triggers include:
- Leaking water pipes or slow drips under the sink
- Steam buildup from dishwashers and stovetops
- Condensation inside or behind cabinet walls
- Cabinets that are rarely opened, causing stale, humid air
- Crumbs, spills, or old food residue inside shelves
Understanding which species are most likely to grow in kitchens starts with learning about the different types of mold. Some of the most common indoor species include Aspergillus, Cladosporium, and black mold (Stachybotrys chartarum). These organisms reproduce via spores that float through the air and settle in moist areas — like your cabinet corners.
Mold doesn’t only affect kitchen spaces — closets are another common hiding place. Learn more in Mold in Your Closet: Signs and Solutions.
Signs of Mold Growth in Cabinets
You might not see mold right away, but there are often early indicators:
- A persistent musty smell inside or around cabinets
- Dark stains or fuzzy spots along wood surfaces or back panels
- Warped wood or peeling finish near moisture sources
- Increased allergy symptoms or difficulty breathing in the kitchen
Preventing Mold in Kitchen Cabinets: 5 Smart Steps
1. Fix Leaks and Drips Immediately
Check under-sink plumbing regularly for signs of moisture, even small ones. A slow drip can easily lead to mold growth in the dark, enclosed space beneath your sink. Tightening fittings, replacing old hoses, or adding insulation to pipes can make a big difference.
2. Increase Airflow and Circulation
Cabinets that stay closed for long periods tend to trap humid air. Open them up occasionally, especially after cooking or cleaning. Using an exhaust fan or range hood during meal prep also helps prevent condensation buildup.
Poor airflow can also lead to mold in other areas like closets. As we explain in this article, small enclosed spaces are a common breeding ground for mold.
3. Control Indoor Humidity
Keep kitchen humidity below 50% with the help of dehumidifiers or exhaust fans. If you notice moisture on windows, walls, or cabinets, that’s a sign your kitchen is too humid. For more tips, check out The Impact of Humidity on Mold Growth.
4. Line Cabinets with Moisture-Resistant Materials
Install mold-resistant shelf liners or moisture barriers inside cabinets, particularly those under sinks. If you’re renovating, consider using mold-inhibiting paints or sealants on cabinet interiors.
5. Clean Cabinets Regularly
Keep cabinets clean and dry. Wipe up any spills right away and remove crumbs or old packaging. Don’t store damp sponges or wet rags inside — these are common sources of hidden moisture.
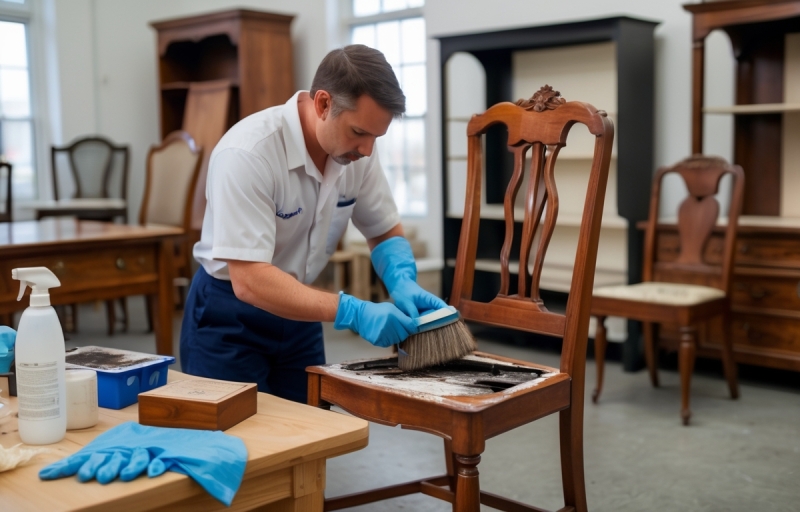
How to Safely Remove Mold from Cabinets
If you’ve spotted mold, here’s how to tackle it step by step:
Step 1: Wear Safety Gear
Use rubber gloves, a face mask (preferably N95), and safety goggles to protect yourself from spores.
Step 2: Clear the Cabinet
Remove everything and check each item. Discard anything moldy or water-damaged, especially porous items like cardboard or cloth.
Step 3: Apply Cleaning Solution
Spray the affected area with white vinegar, hydrogen peroxide, or a non-toxic mold cleaner. Let it sit for 10–15 minutes. Then scrub the surface using a soft brush or sponge until the visible mold is removed.
Step 4: Dry the Area Thoroughly
Use fans or a dehumidifier to ensure the area is completely dry before replacing anything. Never reseal or repaint before you’re 100% sure the moisture is gone.
Step 5: Monitor for Recurrence
Continue checking the cleaned area every few days. If the smell returns or new mold appears, you may have an underlying moisture issue — possibly inside the walls.
With the right DIY mold removal tools, closets can be cleared out and restored without costly services. The same applies to cabinets — if the infestation is small and localized, a careful DIY approach can be safe and effective.
When to Call in Professionals
If the mold covers a large area (typically over 10 square feet), or if you’ve tried cleaning it yourself and it keeps coming back, it’s time to contact a professional. At Kraus Restoration, we offer full-service mold remediation that includes:
- Moisture source detection
- Containment and HEPA filtration
- Professional cleaning and antimicrobial treatment
- Repair or replacement of affected materials
Still not sure if you need expert help? Read Mold Remediation: DIY vs. Professional Help to learn when it’s better to call in the pros.
Final Thoughts
Mold in your kitchen cabinets is something you can’t afford to ignore. By taking preventive steps like fixing leaks, improving ventilation, and using the right cleaning techniques, you can keep mold at bay. And if it does appear, early action — whether DIY or professional — makes all the difference.
Need help fast? Contact Kraus Restoration for a full inspection or mold removal service across Central and Northern NJ.