Water Damage: How to Dry Out Your Home Quickly
Water damage can strike unexpectedly, leaving homeowners in a state of panic. Whether it’s due to a burst pipe, heavy rainfall, or an overflowing appliance, the aftermath can be overwhelming. At Kraus Restoration, NJ’s leaders in water, mold, and fire damage restoration, we understand the urgency of addressing water damage promptly. Our IICRC certified experts are available 24/7 to provide rapid response and professional assistance. In this guide, we’ll share essential tips on how to dry out your home quickly and effectively, ensuring minimal damage and a swift return to normalcy. Serving Central and Northern NJ, Kraus Restoration is just a call away at (973) 886-2021, ready to help you navigate through this challenging time.
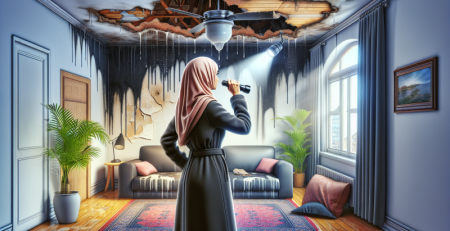
Assessing the Extent of Water Damage
Assessing the extent of water damage is a crucial first step in the process of drying out your home quickly. Understanding the severity of the damage helps in planning the appropriate response and ensures that all affected areas are addressed. Here’s a comprehensive guide to help you assess the extent of water damage in your home.
Visual Inspection
Begin with a thorough visual inspection of your home. Look for obvious signs of water damage such as:
- **Stains and Discoloration:** Water stains on ceilings, walls, and floors are clear indicators of water damage. These stains can range from yellowish-brown to dark brown.
- **Warping and Buckling:** Check for warped or buckled flooring, walls, and ceilings. This is a sign that water has penetrated deeply into the materials.
- **Peeling Paint or Wallpaper:** Water damage often causes paint and wallpaper to peel or bubble.
- **Mold and Mildew:** The presence of mold or mildew is a strong indicator of water damage. Mold can appear as black, green, or white patches and often has a musty odor.
Use of Moisture Meters
To get a more accurate assessment, use moisture meters. These devices measure the moisture content in various materials and can help identify hidden water damage. There are two main types of moisture meters:
- **Pin-Type Meters:** These meters use two pins that penetrate the material to measure moisture content.
- **Pinless Meters:** These meters use electromagnetic signals to detect moisture without penetrating the material.
Infrared Cameras
Infrared cameras are another valuable tool for assessing water damage. They detect temperature variations in materials, which can indicate the presence of moisture. Infrared cameras can help identify hidden water damage behind walls, under floors, and in ceilings.
Professional Assessment
For a comprehensive assessment, consider hiring a professional water damage restoration company. Professionals have the expertise and equipment to thoroughly assess the extent of water damage and develop an effective restoration plan. They can also provide a detailed report, which may be necessary for insurance claims.
Documenting the Damage
Documenting the water damage is essential for insurance purposes and for tracking the restoration process. Take detailed photos and videos of all affected areas. Make sure to capture:
- **Overall Views:** Wide shots of each room to show the extent of the damage.
- **Close-Ups:** Detailed shots of specific damage, such as stains, mold, and warped materials.
- **Before and After:** Photos of the affected areas before and after the restoration process.
Health and Safety Considerations
When assessing water damage, it’s important to consider health and safety. Water damage can lead to mold growth, which can cause respiratory issues and other health problems. Wear protective gear, such as gloves and masks, when inspecting and documenting water damage.
External Resources
For more information on assessing water damage, you can refer to resources such as the Environmental Protection Agency (EPA) and the Federal Emergency Management Agency (FEMA).
Internal Resources
For professional assistance with water damage assessment and restoration, consider contacting Kraus Restoration. They offer a range of services, including water cleanup and mold cleanup. You can also learn more about their projects to see examples of their work.
Conclusion
Assessing the extent of water damage is a critical step in the restoration process. By conducting a thorough visual inspection, using moisture meters and infrared cameras, and documenting the damage, you can develop an effective plan to dry out your home quickly. Remember to consider health and safety, and don’t hesitate to seek professional help if needed.
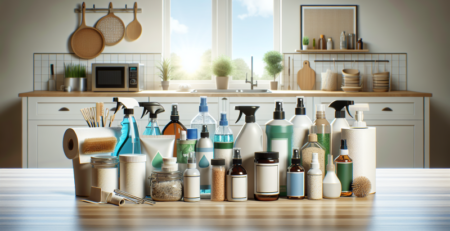
Essential Tools and Equipment for Drying Out
When faced with water damage in your home, acting swiftly is crucial to prevent further deterioration and mold growth. Having the right tools and equipment can significantly expedite the drying process and ensure that your home is restored to its original condition as quickly as possible. Below, we outline the essential tools and equipment you’ll need to effectively dry out your home after water damage.
Dehumidifiers
Dehumidifiers are indispensable when it comes to removing moisture from the air. These devices work by drawing in humid air and passing it over cold coils, which causes the moisture to condense and collect in a reservoir. For large-scale water damage, consider using industrial-grade dehumidifiers, which are more powerful and can handle larger volumes of air. By reducing the humidity levels in your home, dehumidifiers help to speed up the drying process and prevent mold growth.
Air Movers
Air movers, also known as blowers or fans, are essential for circulating air and promoting evaporation. These high-velocity fans are designed to move large volumes of air across wet surfaces, accelerating the drying process. Place air movers strategically around the affected area, focusing on the wettest spots first. For optimal results, use multiple air movers to create a consistent airflow throughout the space.
Moisture Meters
To effectively dry out your home, it’s important to monitor the moisture levels in various materials, such as walls, floors, and furniture. Moisture meters are specialized tools that measure the moisture content in these materials, allowing you to track your progress and ensure that everything is thoroughly dried. There are different types of moisture meters available, including pin-type and pinless models. Choose one that suits your needs and use it regularly to check for hidden moisture pockets.
Wet/Dry Vacuums
Wet/dry vacuums are versatile tools that can handle both liquid and solid debris. These vacuums are particularly useful for extracting standing water from carpets, floors, and other surfaces. When using a wet/dry vacuum, make sure to empty the tank frequently to maintain its efficiency. Additionally, some models come with specialized attachments for cleaning hard-to-reach areas, making them even more effective in water damage restoration.
Hygrometers
Hygrometers measure the humidity levels in the air, providing valuable information about the overall moisture content in your home. By keeping an eye on the humidity levels, you can adjust your drying strategy as needed to ensure that the environment remains conducive to drying. Hygrometers are available in both digital and analog formats, so choose one that offers the features you need for accurate monitoring.
Infrared Cameras
Infrared cameras are advanced tools that can detect moisture hidden behind walls, ceilings, and floors. These cameras use thermal imaging technology to identify temperature differences, which can indicate the presence of moisture. By pinpointing the exact locations of hidden moisture, infrared cameras help you target your drying efforts more effectively, ensuring that no area is overlooked.
Desiccants
Desiccants are materials that absorb moisture from the air, making them useful for controlling humidity levels in enclosed spaces. Common desiccants include silica gel, calcium chloride, and activated charcoal. Place desiccants in areas with high humidity to help reduce moisture levels and speed up the drying process. While desiccants are not a substitute for dehumidifiers and air movers, they can be a valuable addition to your drying toolkit.
Professional Services
While having the right tools and equipment is essential, sometimes the extent of water damage requires professional intervention. Companies like Kraus Restoration offer comprehensive water cleanup services that utilize advanced equipment and techniques to restore your home efficiently. Their expertise can be invaluable in situations where the damage is extensive or difficult to manage on your own.
In conclusion, drying out your home quickly after water damage requires a combination of the right tools and strategic planning. Dehumidifiers, air movers, moisture meters, wet/dry vacuums, hygrometers, infrared cameras, and desiccants all play crucial roles in the drying process. Additionally, don’t hesitate to seek professional help if needed. For more information about the services offered by Kraus Restoration, visit their about page or contact them directly. By taking prompt action and using the appropriate equipment, you can effectively mitigate water damage and restore your home to its original condition.
Steps to Remove Standing Water
Removing standing water is a crucial first step in addressing water damage and ensuring your home dries out quickly. Standing water can cause extensive damage to your property and create a breeding ground for mold and bacteria. Here are the essential steps to effectively remove standing water from your home:
1. Ensure Safety First
Before you begin the water removal process, ensure that it is safe to enter the affected area. Turn off the electricity to prevent any risk of electrocution. If the water level is high, wear protective gear such as rubber boots and gloves to avoid contact with contaminated water.
2. Assess the Situation
Evaluate the extent of the water damage. Determine the source of the water and whether it is clean, gray, or black water. Clean water comes from sources like broken pipes or rain, while gray water is slightly contaminated, and black water is highly contaminated, often containing sewage. This assessment will help you decide on the appropriate removal method and whether professional help is needed.
3. Use a Wet/Dry Vacuum
For small to moderate amounts of standing water, a wet/dry vacuum is an effective tool. These vacuums are designed to handle water and can quickly suck up the liquid. Ensure the vacuum is plugged into a GFCI outlet to prevent electrical hazards. Move the vacuum slowly over the water to allow it to collect as much as possible.
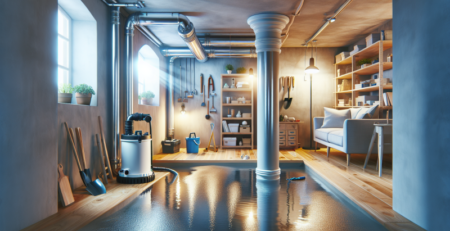
4. Employ Submersible Pumps
For larger volumes of water, submersible pumps are more efficient. These pumps can be placed directly into the water and will pump it out through a hose. Direct the hose to a safe drainage area, such as a storm drain or a location far from your home’s foundation. Submersible pumps are especially useful in basements or areas with significant flooding.
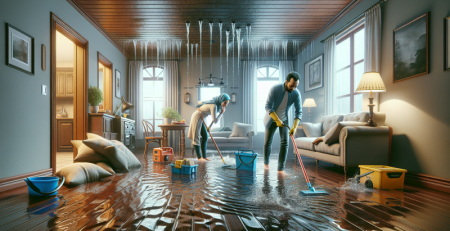
5. Utilize Buckets and Mops
In situations where you don’t have access to a wet/dry vacuum or submersible pump, traditional methods like buckets and mops can be used. While more labor-intensive, these tools can help you remove water from smaller areas. Use buckets to scoop out the water and mops to absorb the remaining moisture.
6. Remove Soaked Items
Once the standing water is removed, it’s essential to address soaked items such as carpets, furniture, and personal belongings. Remove these items from the affected area to prevent further damage and allow them to dry separately. Items that are severely damaged or contaminated may need to be discarded.
7. Dry the Area Thoroughly
After removing the standing water, the next step is to dry the area thoroughly. Use fans, dehumidifiers, and open windows to promote air circulation and speed up the drying process. Pay special attention to hidden areas like behind walls and under floors, as these can harbor moisture and lead to mold growth.
8. Sanitize the Area
Sanitizing the affected area is crucial to prevent mold and bacteria growth. Use a mixture of water and bleach or a commercial disinfectant to clean all surfaces that came into contact with the water. This step is particularly important if the water was gray or black, as it may contain harmful contaminants.
9. Monitor for Mold
Even after thorough drying and sanitizing, it’s essential to monitor the area for signs of mold. Mold can develop within 24-48 hours of water exposure. Look for visible signs of mold growth and musty odors. If you suspect mold, consider contacting a professional for mold cleanup services.
10. Seek Professional Help if Needed
If the water damage is extensive or if you’re dealing with black water, it’s advisable to seek professional help. Water damage restoration professionals have the expertise and equipment to handle severe cases and ensure your home is thoroughly dried and sanitized. For more information on professional water cleanup services, visit our services page.
By following these steps, you can effectively remove standing water and begin the process of drying out your home. For additional support or to learn more about our restoration services, feel free to contact us.
Drying Out Walls and Floors Efficiently
When faced with water damage in your home, drying out walls and floors efficiently is crucial to prevent further damage and potential health risks. Water can seep into the structural elements of your home, leading to mold growth, wood rot, and other serious issues. Here’s a comprehensive guide to help you dry out your home quickly and effectively.
Assess the Damage
Before you begin the drying process, it’s essential to assess the extent of the water damage. Identify the source of the water and ensure it has been stopped. This could be due to a burst pipe, flooding, or a leaking roof. Once the source is under control, you can start evaluating the affected areas. Check for visible signs of water damage on walls, floors, and ceilings. Look for discoloration, warping, and any musty odors that might indicate mold growth.
Remove Standing Water
The first step in drying out your home is to remove any standing water. Use a wet/dry vacuum to extract as much water as possible from carpets, floors, and other surfaces. If the water level is significant, you might need to use a submersible pump. Be sure to wear protective gear, such as gloves and boots, to avoid contact with contaminated water.
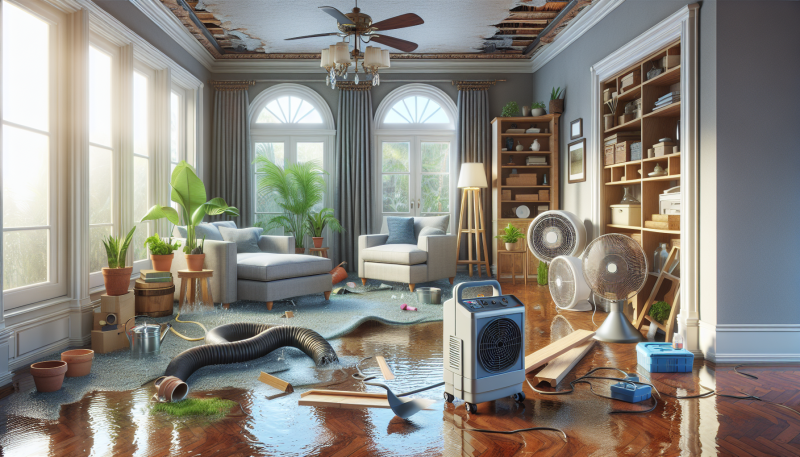
Increase Air Circulation
Proper air circulation is vital for drying out walls and floors efficiently. Open all windows and doors to allow fresh air to circulate throughout your home. Use fans and dehumidifiers to speed up the drying process. Position fans to blow air across the wet surfaces, and place dehumidifiers in the center of the affected areas to remove moisture from the air. For large-scale water damage, consider renting industrial-grade equipment.
Remove Wet Materials
Wet materials, such as carpets, rugs, and furniture, can retain moisture and hinder the drying process. Remove these items from the affected areas and place them in a dry, well-ventilated space. If the carpets and rugs are heavily saturated, they may need professional cleaning or replacement. Check for water damage behind baseboards and remove them if necessary to allow the walls to dry completely.
Drying Out Walls
Drying out walls can be challenging, especially if water has seeped into the insulation and drywall. Start by removing any baseboards and drilling small holes near the floor to allow air to circulate behind the walls. Use a moisture meter to check the moisture levels in the walls. If the readings are high, you may need to cut out and replace the affected drywall. Use fans and dehumidifiers to dry the walls thoroughly. For severe cases, consider hiring a professional water damage restoration service.
Drying Out Floors
Different types of flooring require different drying methods. For hardwood floors, use fans and dehumidifiers to remove moisture. You may need to remove a few floorboards to allow air to circulate underneath. For tile and vinyl floors, remove any standing water and use fans to dry the surface. If you have carpeted floors, use a wet/dry vacuum to extract water and place fans and dehumidifiers to dry the area. In some cases, you may need to lift the carpet and remove the padding to prevent mold growth.
Preventing Mold Growth
Mold can start growing within 24-48 hours of water exposure, so it’s crucial to act quickly. Use a mold inhibitor on affected areas to prevent mold growth. Keep an eye out for any signs of mold, such as discoloration and musty odors. If you suspect mold growth, consider contacting a professional mold cleanup service to ensure your home is safe and mold-free.
Professional Help
In cases of extensive water damage, it’s wise to seek professional help. Water damage restoration experts have the necessary equipment and expertise to dry out your home efficiently and prevent further damage. They can also help with mold cleanup and ensure your home is restored to its original condition.
For more information about our water damage restoration services, visit our water cleanup page. If you need assistance with mold removal, check out our mold cleanup services. Feel free to contact us for any inquiries or to schedule a consultation.
By following these steps, you can effectively dry out your walls and floors, preventing further damage and ensuring a safe and healthy living environment.
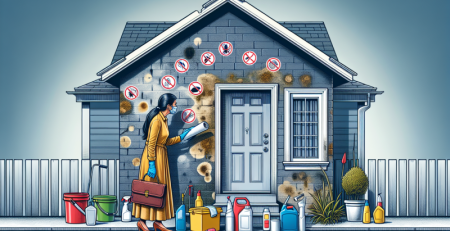
Preventing Mold and Mildew Growth
Mold and mildew are common and potentially hazardous consequences of water damage in homes. These fungi thrive in damp environments, making it crucial to address water damage promptly and effectively to prevent their growth. Understanding how to prevent mold and mildew can save you from extensive repairs and health issues. Here’s a comprehensive guide to help you keep your home mold-free after water damage.
Immediate Action Steps
The first step in preventing mold and mildew is to act quickly. Mold can begin to grow within 24 to 48 hours of water exposure. Start by removing any standing water using pumps, wet vacuums, or mops. Ensure that all affected areas are thoroughly dried. Open windows and doors to improve ventilation, and use fans and dehumidifiers to expedite the drying process.
Thorough Cleaning
Cleaning is essential to remove any mold spores that may have already started to develop. Use a mixture of water and detergent to scrub hard surfaces. For more stubborn mold, a solution of one cup of bleach to one gallon of water can be effective. However, be cautious when using bleach and ensure the area is well-ventilated. Always wear protective gear, such as gloves and masks, to avoid exposure to mold spores and harsh chemicals.
Drying Out Materials
Porous materials like carpets, drywall, and insulation can retain moisture and become breeding grounds for mold. If these materials are extensively damaged, it may be best to remove and replace them. For less severe cases, professional drying services can help salvage these materials. Consider contacting a professional water cleanup service to ensure thorough drying and mold prevention.
Dehumidification
Maintaining low humidity levels in your home is crucial for mold prevention. Use dehumidifiers to keep indoor humidity below 60%. In particularly damp areas, such as basements, consider installing a permanent dehumidification system. Regularly check and empty the dehumidifier’s water collection container to ensure it operates efficiently.
Regular Inspections
After the initial cleanup, continue to monitor your home for signs of mold. Pay special attention to areas that were previously affected by water damage. Look for discoloration, musty odors, and any visible mold growth. Regular inspections can help you catch mold early and address it before it becomes a significant problem.
Professional Help
Sometimes, despite your best efforts, mold can still develop. In such cases, it’s essential to seek professional help. Mold remediation experts have the tools and expertise to handle extensive mold infestations safely and effectively. They can also provide valuable advice on preventing future mold growth. If you suspect mold in your home, don’t hesitate to contact a professional mold cleanup service.
Preventative Measures
To prevent future mold growth, take steps to control moisture in your home. Fix any leaks in roofs, walls, or plumbing promptly. Ensure that your home’s exterior is properly sealed to prevent water from seeping in. Use exhaust fans in bathrooms and kitchens to reduce humidity levels. Additionally, consider using mold-resistant products, such as mold-resistant drywall and paint, in areas prone to moisture.
Conclusion
Preventing mold and mildew growth after water damage requires prompt action, thorough cleaning, and ongoing vigilance. By following these steps, you can protect your home from the damaging effects of mold and ensure a healthy living environment. For more information on water damage restoration and mold prevention, visit our services page. If you need professional assistance, our team is ready to help with all your water cleanup and mold remediation needs. Explore our projects to see how we’ve helped other homeowners restore their properties.
Restoring and Repairing Damaged Areas
When water damage strikes, the aftermath can be overwhelming. The key to mitigating long-term damage is to act swiftly and efficiently. Once you have successfully dried out your home, the next crucial step is to restore and repair the damaged areas. This process involves several stages, each essential to returning your home to its pre-damage condition.
First and foremost, assess the extent of the damage. This involves a thorough inspection of all affected areas, including walls, floors, ceilings, and any personal belongings. Look for signs of structural damage, such as warping, swelling, or discoloration. It’s also important to check for mold growth, which can begin to develop within 24 to 48 hours of water exposure. If you find mold, it’s imperative to address it immediately, as it can pose serious health risks. For professional assistance, consider reaching out to a specialized service like mold cleanup.
Once you have a clear understanding of the damage, the next step is to remove any materials that cannot be salvaged. This may include drywall, insulation, carpeting, and certain types of flooring. Removing these materials is crucial to prevent further damage and to create a clean slate for repairs. Be sure to wear protective gear, such as gloves and masks, to safeguard yourself from potential contaminants.
After removing unsalvageable materials, the drying process must continue. Even if the surface appears dry, moisture can linger within walls, floors, and other structures. Use dehumidifiers and fans to ensure that all areas are thoroughly dried. It’s also a good idea to use moisture meters to check for hidden dampness. This step is vital to prevent future mold growth and structural issues.
With the area completely dry, you can begin the restoration process. Start by repairing any structural damage. This may involve replacing drywall, reinforcing beams, or repairing flooring. For extensive damage, it might be wise to consult with a professional restoration service. They can provide expert guidance and ensure that repairs are done correctly and safely. For more information on professional services, you can visit our services page.
Next, focus on cosmetic repairs. This includes painting walls, refinishing floors, and replacing any damaged fixtures. When selecting materials, consider using water-resistant options to minimize future risks. For instance, opt for waterproof paint and flooring materials designed to withstand moisture. These choices can provide an added layer of protection against potential future water damage.
In addition to structural and cosmetic repairs, it’s important to address any potential issues with your home’s electrical and plumbing systems. Water damage can compromise these systems, leading to safety hazards. Have a licensed electrician inspect your electrical system to ensure there are no hidden dangers. Similarly, a plumber should check for any leaks or damage to pipes that could cause future problems.
Finally, take preventive measures to protect your home from future water damage. This includes regular maintenance of your home’s exterior, such as cleaning gutters, inspecting the roof for leaks, and ensuring proper drainage around your property. Installing a sump pump in your basement can also help manage excess water during heavy rains. For more detailed projects and preventive measures, you can explore our projects page.
In conclusion, restoring and repairing damaged areas after water damage is a multi-step process that requires careful planning and execution. By thoroughly assessing the damage, removing unsalvageable materials, ensuring complete dryness, and making necessary repairs, you can effectively restore your home. Additionally, taking preventive measures can help safeguard your home against future water damage. For professional assistance and more information on restoration services, don’t hesitate to contact us.
When to Call a Professional for Help
Water damage can be a homeowner’s worst nightmare, causing significant stress and potential financial burden. While some minor water damage issues can be managed with DIY methods, there are certain situations where calling a professional is not just recommended but essential. Understanding when to seek expert help can save you time, money, and prevent further damage to your home.
One of the primary indicators that you need professional assistance is the extent of the water damage. If the affected area is larger than 10 square feet, it’s a clear sign that the damage is beyond a simple DIY fix. Large-scale water damage often involves structural components of your home, such as walls, floors, and ceilings, which require specialized equipment and expertise to properly dry out and restore. Professionals have the necessary tools, like industrial-grade dehumidifiers and air movers, to handle extensive water damage efficiently.
Another critical factor is the type of water involved. Water damage is categorized into three types: clean water, gray water, and black water. Clean water comes from sources like broken pipes or rain, and while it’s the least harmful, it still requires prompt attention. Gray water, from sources like dishwashers or washing machines, contains contaminants and poses a higher risk. Black water, which includes sewage and floodwater, is highly hazardous and can cause severe health issues. If your home has been affected by gray or black water, it’s imperative to call professionals immediately. They have the expertise to handle hazardous materials safely and ensure thorough water cleanup.
Mold growth is another serious concern following water damage. Mold can begin to develop within 24 to 48 hours of water exposure and can spread rapidly, causing health problems such as allergies, respiratory issues, and even infections. If you notice any signs of mold, such as a musty odor or visible spores, it’s crucial to contact a professional mold remediation service. Experts can assess the extent of the mold infestation and carry out effective mold cleanup to ensure your home is safe and healthy.
Structural damage is a significant risk associated with water damage. Water can weaken the structural integrity of your home, affecting the foundation, walls, and support beams. If you observe any signs of structural damage, such as cracks in the walls, sagging ceilings, or warped floors, it’s essential to call a professional immediately. Structural repairs require specialized knowledge and skills to ensure the safety and stability of your home.
Electrical hazards are another reason to seek professional help. Water and electricity are a dangerous combination, and water damage can compromise your home’s electrical system. If you suspect that water has come into contact with electrical outlets, wiring, or appliances, do not attempt to address the issue yourself. Contact a professional to safely inspect and repair any electrical damage.
In addition to these specific scenarios, it’s also wise to call a professional if you feel overwhelmed or unsure about how to handle the water damage. Professionals can provide a comprehensive assessment of the damage, develop a detailed restoration plan, and carry out the necessary repairs efficiently. This not only ensures that the job is done correctly but also gives you peace of mind knowing that your home is in capable hands.
For those in need of professional water damage restoration services, Kraus Restoration offers a range of solutions tailored to your specific needs. Their team of experts is equipped to handle everything from minor water leaks to major flood damage, ensuring your home is restored to its original condition. To learn more about their services, visit their about page or contact them directly for assistance.
In conclusion, while minor water damage can sometimes be managed with DIY methods, there are clear indicators that professional help is necessary. Extensive damage, hazardous water types, mold growth, structural issues, and electrical hazards all warrant the expertise of a professional restoration service. By recognizing these signs and acting promptly, you can protect your home and ensure a safe and effective restoration process.
In conclusion, dealing with water damage in your home can be a daunting and stressful experience, but taking swift and effective action can significantly mitigate the impact. By following the steps outlined in this guide—assessing the damage, removing standing water, drying out affected areas, and preventing mold growth—you can restore your home to its former state more efficiently. Remember, the key to minimizing water damage is acting quickly and thoroughly. If the situation feels overwhelming or beyond your capability, don’t hesitate to seek professional help. By staying informed and prepared, you can protect your home and ensure a safe, dry living environment for you and your family.